
Tactile mapping for conferences and events @ UVa
Fabrication review opens up design and data science opportunities with a vision on policy driven accommodation improvements on grounds
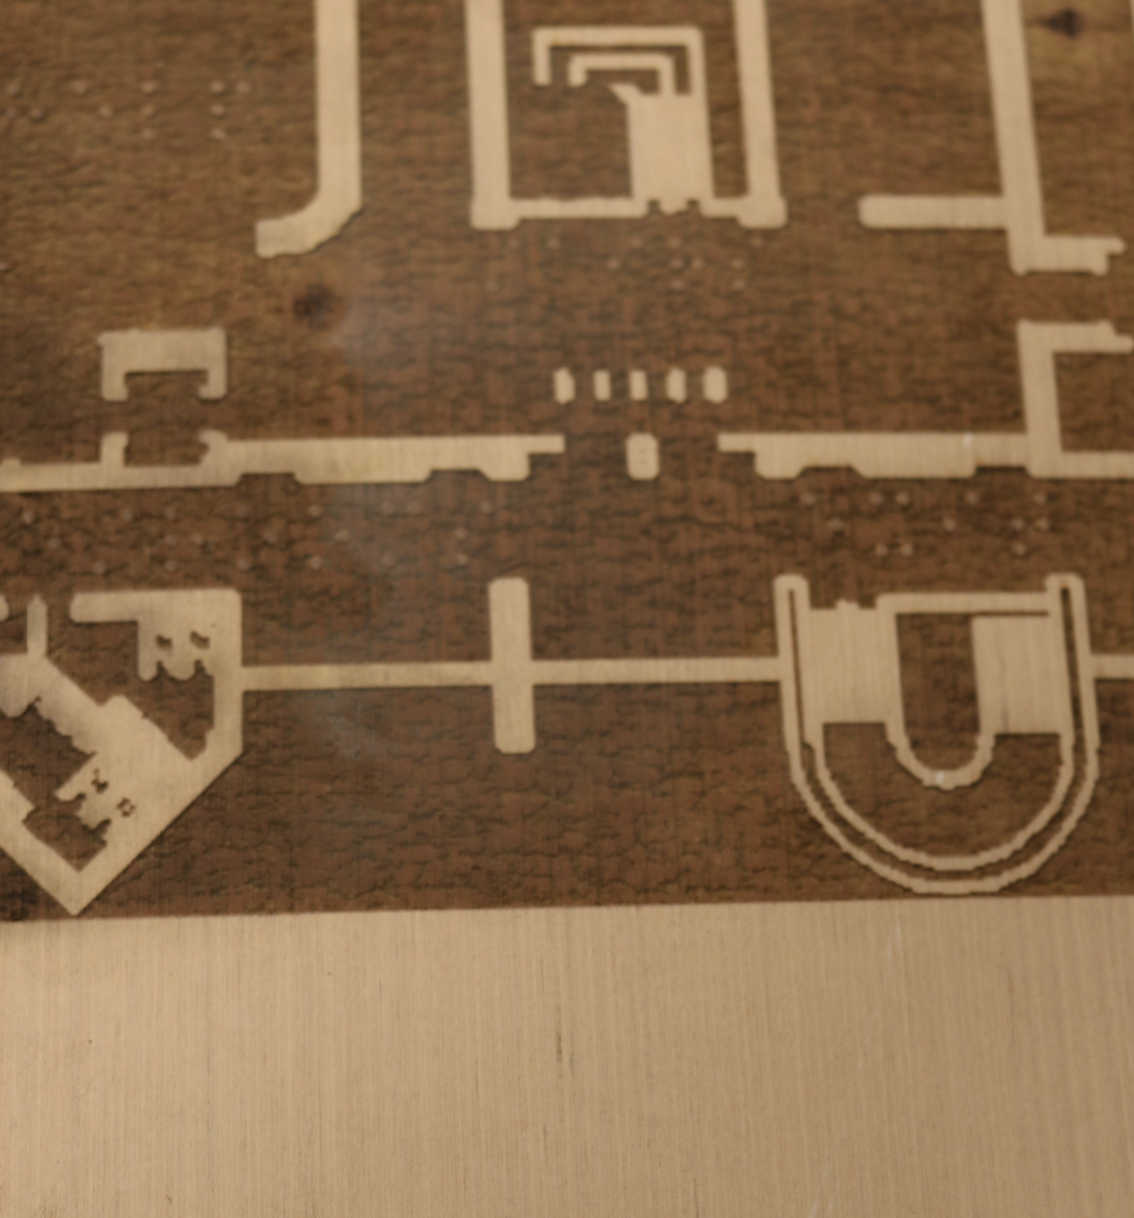
 This is an image of braille etched in to 3.5mm wood where the dots are about .5mm above the surface of the laser etched area. In other words we burned around the braille - removing the background and leaving the dots to form readable letters
Acknowledgements:
A special thanks to fabrication friends across grounds - Melissa Goldman at the Architecture School, William Guilford in Biomedical Engineering, Erich Purpur in the Science and Engineering Library, and Sam Flippo at the Drama Department. Without their physical presence this work would not have been possible.
To the data scientists - Will Rourke from Robertson Media Center, Ammon Shepherd from the Scholars Lab, Erich Purpur in Science and Engineering, Jeff Owen in Facilities Management - for helping bring this process in to the 3rd millennium.
To my colleagues in the Health Sciences Library - David Moody, Kyle Bowman, Bart Ragon and Andrea Denton for helping me connect the dots internally and across grounds (get it- braille joke?), as well as providing the freedom and guidance to do this research.
And most importantly to the people driving the mission of this project - Catherine Bacik at the Virginia Department for the Blind and Vision Impaired, Lori Kressin with Accessibility Resources, Barbara Zunder with Student Health, and Melvin Mallory of ADA Compliance.
Abstract:
Creating tactile maps is generally considered to be a time consuming and expensive process requiring significant expertise in the field. Here we examine rapid prototyping techniques so simple and affordable that events like conferences - where vendor booths, food tables, and other ephemeral items - are made more accessible through tactile maps. After a modest review of the literature and with some familiarity of UVa fabrication utilities we were able to go from UVa floorplans (provided by facilities management) to accessible tactile maps - with material costs as low as $1 and production times in the 20-30 minute realm. Looking more broadly at wayfinding we also review opportunities to improve accessibility through better design and data science work.
Introduction:
`Tactile maps are physical representations of spaces - they are useful for helping blind and vision impaired people navigate spaces and maintain greater autonomy. Tactile mapping has been in use for many years, however the availability and affordability of rapid prototyping tools opens up opportunities to integrate the production of tactile mapping in ways previously not possible. Here we explore in depth a two part production technique for conference events - where known mapped spaces may have additional items like vendor booths or food tables. Secondly we look to open source digital wayfinding technologies and apps for more realtime real space alerting.
Initial Goals:
- Create an attractive, sanitary, stationary tactile maps that can be placed in the library and made useful for all patrons. Consider a call to artists to make “landmark maps” working to the specs of other maps, but in various media?
- Create tactile map “hand-outs” - low cost replications of “mold” maps that help in wayfinding to and around the library. These dispensable maps may be made available to community centers, senior centers, and anywhere else that might benefit from having visually impaired wayfinding needs for the hospital and its surrounding environment.
- Create digital models that are accessible online and can be rendered in real time such that data science work may be done
Methods:
A first search pass in to tactile mapping led us to https://www.touch-mapper.org. With the help of Erich Purpur and the Brown Science and Engineering makerbot 5 models were printed. All of these failed to print well for various reasons. After communicating with Sam Flippo in the Theater Department and William Guillford in Biomechanical Engineering we were informed that 3d printed standard low-cost PLA filament doesn’t play well with vacuum thermoforming. This meant that downstream products such as affordable duplicates would not work with this process and led us back to the drawing board. The other two readily available alternatives locally available were laser cutting and CNC milling. CNC is a gold standard in manufacturing that can provide micron level tolerances with low effort. Laser, on the other hand, is a somewhat less precise, but much faster to develop and pre-process. We looked to laser cutting and found some literature on the subject https://wiki.openstreetmap.org/wiki/User:Head/HaptoRender and decided to move forward.
Affordability and ease of production and reproduction are the guiding principles of this investigation. Also in the interest of scientific diligence and reproducibility all instructions are given in open source and other freely available software. Our “minimum value product” cost $1 and an hour in graphics development plus an additional $1.00 and 2 minutes per duplicate. This does not take in to account access to equipment, however it does provide a sense of cost and effort.
Materials and Methods
First Draft - 3d printing
3d printing is a ubiquitous, affordable, and relatively efficient way to render physical data - and we found a website https://touch-mapper.org/ - that automated tactile map generation for 3d printers using Open Street map data. The process is simple - input a desired address and scale and wait for your map to render. You may either download the map to print yourself or order the map online to be delivered… We downloaded ours and went to work
In short the results weren’t great… but at least we failed quickly :) Here are some notes
Results - Cons
- Problems printing - taking the stl file to a 3d printer in the science and engineering library proved to warp heavily. Tests at 100%, 90%, 70%, and 60% all failed… but there was a failure behind the scenes lurking
- Standard PLA models won’t work with vacuum forming duplication machines. The PLA plastic is likely to melt on to the master, meaning that even if our 3d printed form worked it wouldn’t be a great tool for making duplicates
- Also something of a failure in the sense that it doesn’t work for inside our buildings
Results - Pros & opportunities to improve
- There are many types of filament. ABS plastic, nylon, and carbon fiber alternatives all exist
- Open Street Map is a great data set for street level content - there are content paths for vision impairment
Second Draft - laser etching & vacuum forming
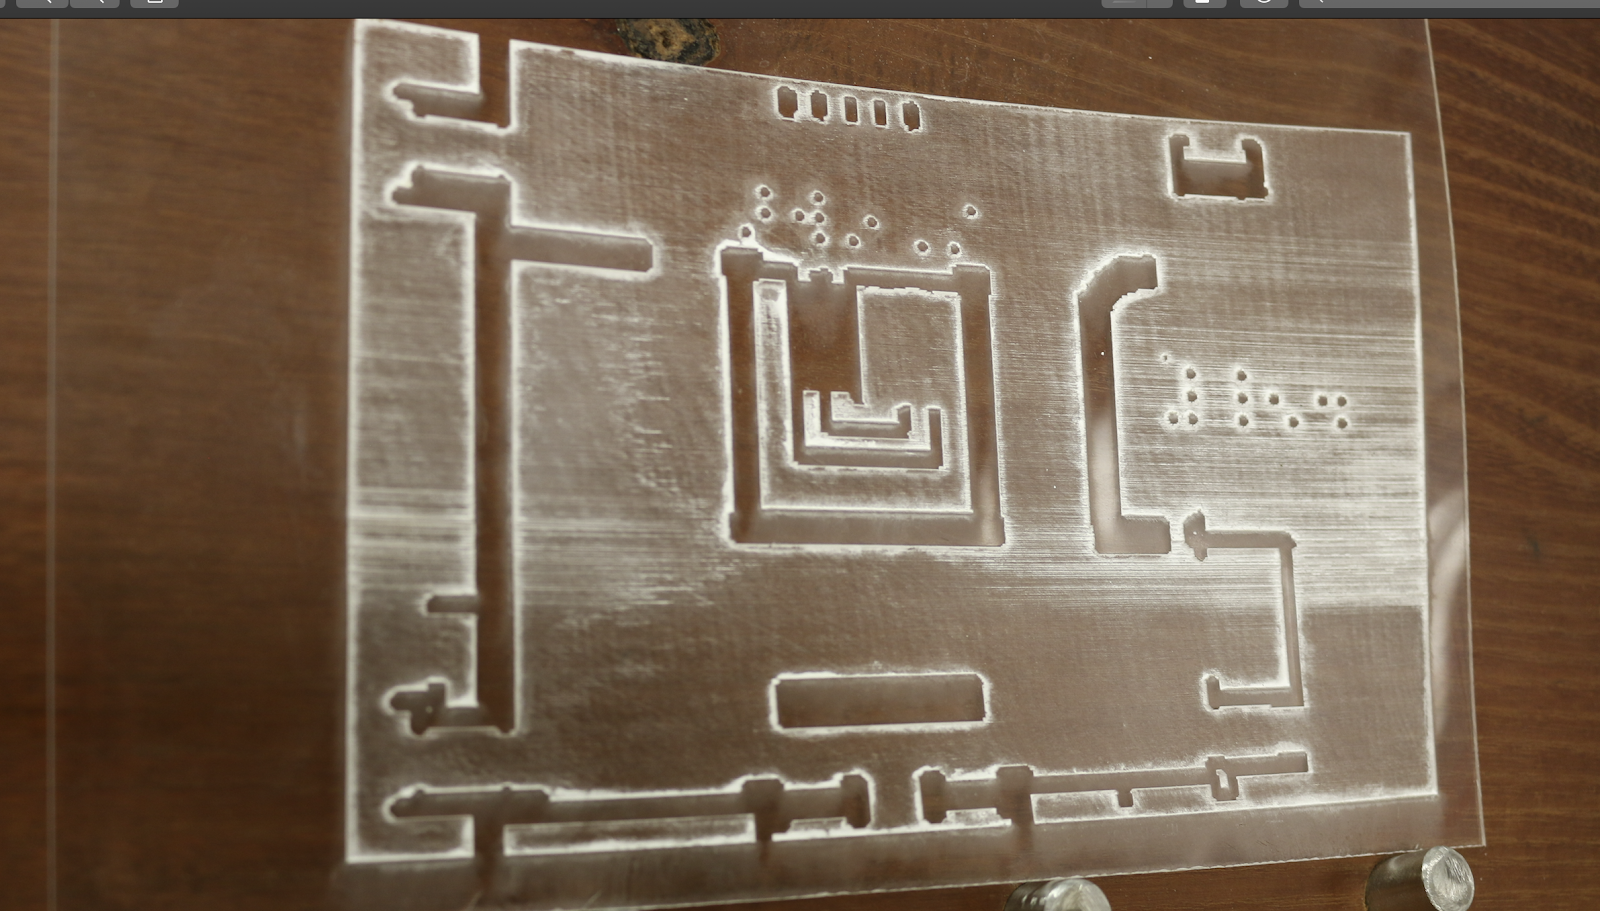
Our second effort added a lot of variables. To begin with we decided to get the original CAD designs from the UVa facilities department. The immediate benefit of this approach is that we now are developing a process for working inside our buildings - something that Open Street Map data would not do. After some processing, described below, we were able to use the A-School laser cutters to produce our first accurate maps. Several tests were made to adjust the depth and precision of the maps, and after several runs we had a presentable mold. The mold was taken over to the Theater department where - after additional physical editing the first vacuum form duplicate was made. This process start to finish requires as little as 45 minutes and is the basis of our first inquiry back to the community.
Process details
Software used
- LibreCAD / QCAD - open source alternatives for autocad… the CAD work being done is very limited, so these tools seem sufficient for now
- GIMP - filling in blanks on from CAD design gaps
- InkScape - are being used for development.
Step 1) CAD work
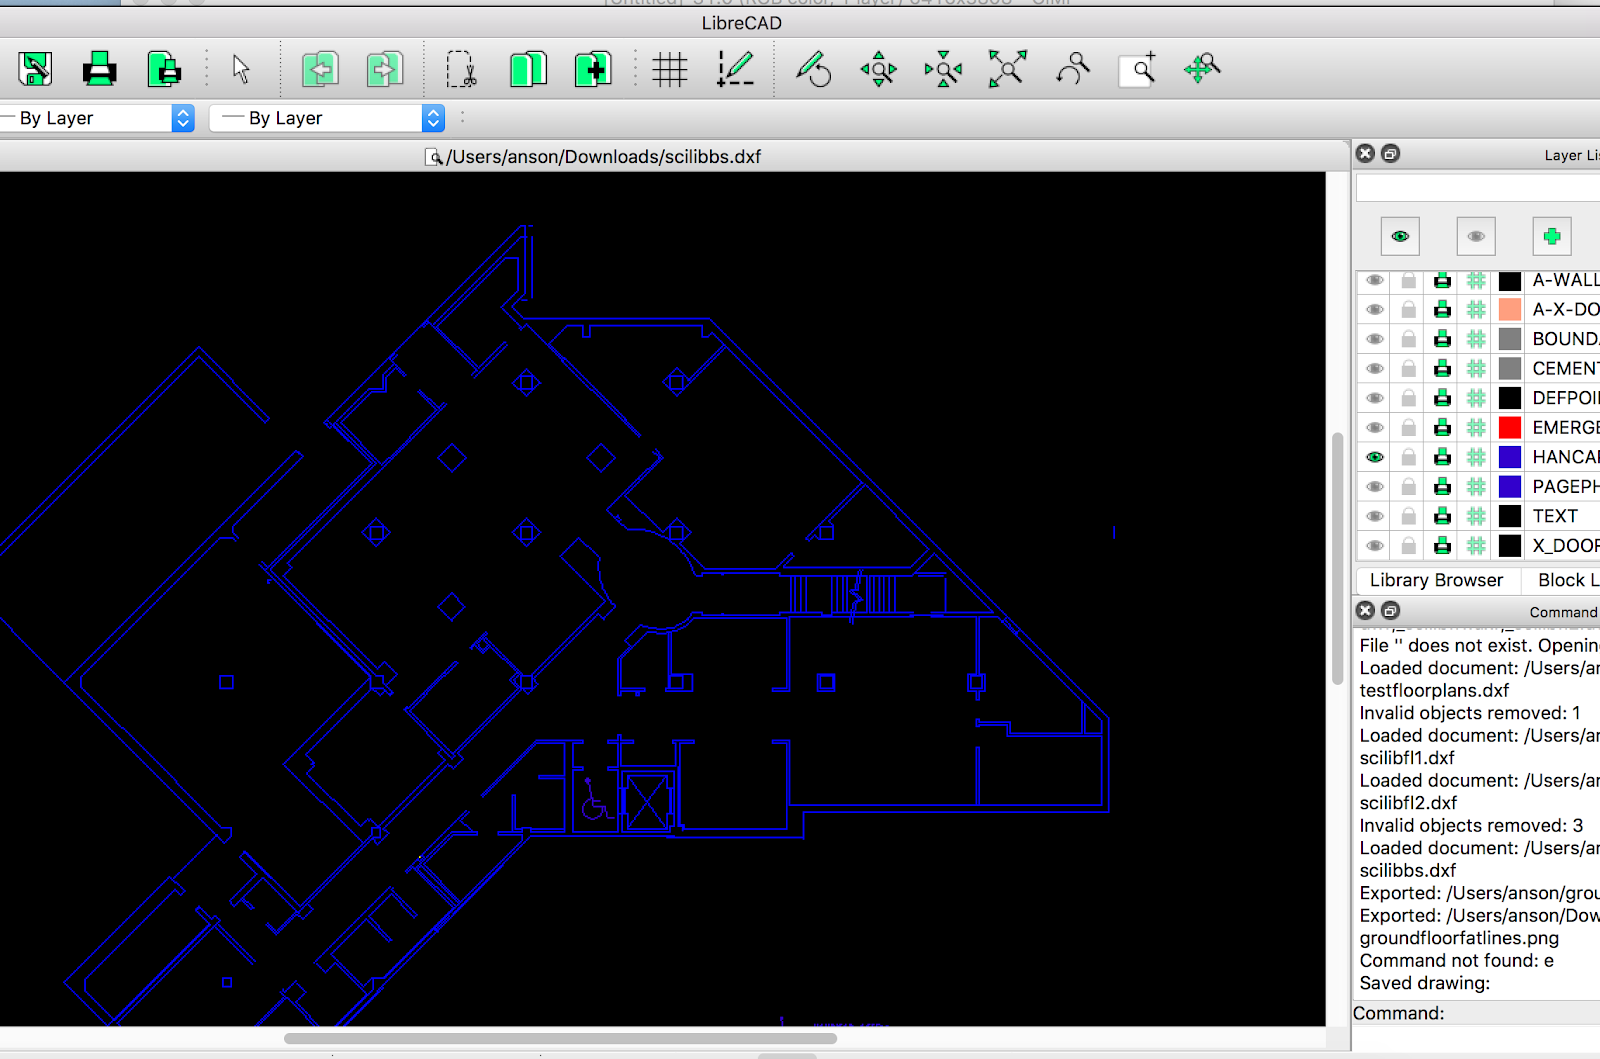
Initial files provided in DXF format - an industry standard and in the case of UVa these floorplans have an abundance of detail. Tactile maps benefit from a minimalist approach - so using LibreCAD (QCAD also looks suitable) we removed all of the layers that weren’t absolutely necessary. LibreCAD has a DXF->PNG exporter - and this is what we rendered for the next step in our process.
Notes: This is probably the first opportunity for some data science. As a “for instance” we could run a traccar server to gather real GPS data from users at the < 1m level and then apply it to CAD files to select the right right lines for our files?
Step 2) Graphics work
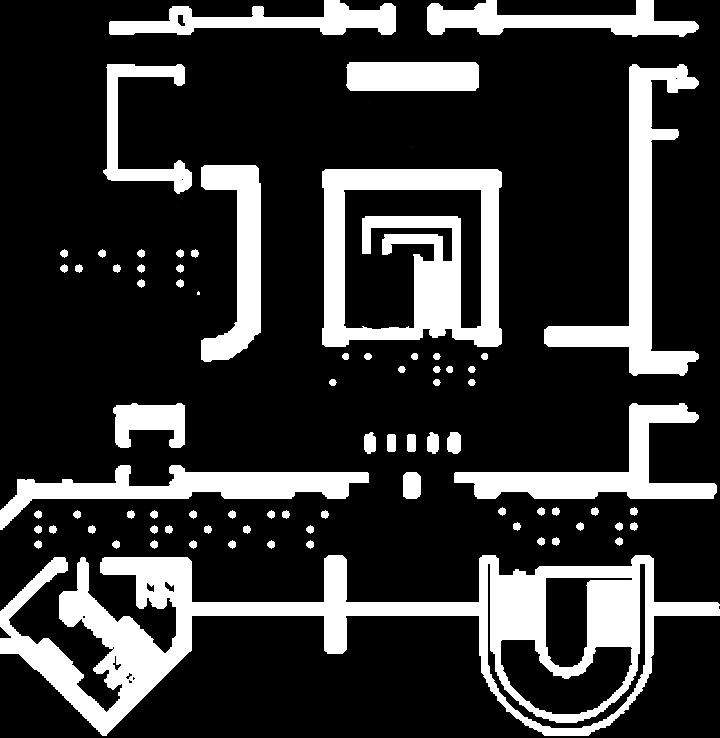
GIMP is a well known and well documented graphics manipulation program. Once the DXF file is exported to PNG we can manipulate the thickness of lines (aka walls), the size of braille writing, and other details that make a map more usable.
Notes: This is the first phase where better and more consistent design approaches need to be developed and documented. Once a standard thickness for walls is achieved, or how to place the number of steps between places? Etc.. etc..
Step 3) Raster laser printing
Once the final PNG is saved in GIMP it may be lasered on to materials.
Notes: My tests are listed below with screenshots etc... times varied between 20 and 30 minutes for a 10” square model, and depths of cut ranged from 1.1 to .7mm. Too deep on the wood makes things braille break off during the vacuum forming, too shallow and the markings do not transfer
Notes: we may want to polyurethane, shelaq, or otherwise smooth the surface of the laser for smoother duplication.
We may also want to have things like arrows and such that we can overlay on these master molds so that events may have their own maps at minimal cost (instead of re-creating the whole map, just add overlays with new braille, event booths etc...
Step 4) Vacuum forming
The vacuum forming machine in the theater department is enormous - it can handle up to 4’x6’ objects
We used the machine over in the Theater department under the guidance of Sam Flippo - and so the ease of production may be exaggerated due to her high level of skill in the matter… that said the process was seamless and intuitive.
From the laser the wooden or acrylic model the model must have holes drilled in to it - these may be
3rd Draft - Planning an event...
Digital workflow:
Started out with the DXF floorplans from UVa facilities
Installed Librecad (free)
The layers on the right can get turned on and off - i turned off as many layers as seemed possible...
From DXF -> PNG
Using Gimp - primarily filled in the blanks, made the image blockier, removed more details, added Grade 2 Braille - to begin with just the stairs, exit, help, and restrooms are labeled... need to figure out a legend plan

added Swell braille font https://www.tsbvi.edu/download-braille-and-asl-specialty-fonts
printed in raster format
printer settings

Cutting results
|
notes |
material |
machine |
images |
|
Started with an etch setting of 60%power, 70%speed, and 200ppi - 21 minutes = results aren't looking good the dots are blurred because they weren’t 100% white in the image |
Birch 3/16 |
100W laser |
|
|
80% power, 50% speed 200PPI = full 1mm deep cuts, looking very solid
|
Birch 3/16 |
100W laser |
|
|
80% power, 50%, speed 200PPI The acrylic was too thin - 1/16” - it started warping after processing for a while |
1/16 acrylic |
100W laser |
|
|
100% & 60%, speed 200PPI Better results - moving faster seemed to help |
1/16 acrylic |
100W laser |
|
|
100%, 40% speed 200 PPI = 30 minutes Slow work, looking good |
Birch 3/16 |
100W laser |
|
|
100% power, 60% speed ppi 200 … garbage. The grain of the wood makes this a useless product except perhaps for backing with the thinner birch plywood. |
¾ plywood |
|
|
|
Multiple tests from 100% power burnout issues, to 40% power 70%speed = etching, not overburning but not really going deep enough… not a great product |
Cork |
|
|
|
100% power 50% speed = decent… might slow it down some more and get a better line..or cut it twice?
|
acrylic ¼” |
|
|
|
100% power 60% speed… great precision, but if cutting with the grain the ridges can get wonky |
Bamboo |
|
|
|
100% power 30% speed 200ppi
… beautiful… a bit slow |
acrylic |
|
|

Commenting on blog posts requires an account.
Login is required to interact with this comment. Please and try again.
If you do not have an account, Register Now.